 |
| Photo © Danny North for Book of Denim by Code Magazine in ENDRIME studio |
Since early 2010 - I have been slowly building up my vintage sewing machines in my London ENDRIME Denim studio. In fact i was the 1st person in London to have a working denim sampling / factory in June 2012 - and even helped establish Blackhorse Lane Ateliers, in 2016 as I was a founding member.
Below is a video Stylesight / WGSN did about my vintage machine obsession few years back in my ENDRIME London studio.
STYLESIGHT VISIT ENDRIME PART 2 from ENDRIME on Vimeo.
I collect old sewing machines, mostly Union Special machines from the 1930s and 1950 period. Most people think buying an old looking fabric is most of the work, but to really really understand how old production garments are made, you must know your machines
Its not to hard finding certain vintage sewing machines now - especially through blogs and many videos online including many I have made my self, educating many along the way with my own journey - Its been a pure privilege becoming a well known specialist in the subject, and I never get bored talking about vintage machines, and there relationship with being a better designer :
check out this Article i wrote for Heddels on the subject:

Many denim heads and denim shops are often asking me - "how to get certain machines... prices..." and most of the time, I point them towards a shop or a seller - but the popularity of certain machines and the romanticised nature, the allure of acquiring certain machines - the holy grail so to speak "to complete the set" has never stopped, and more and more people / designers are interested in the machines.
The 1st few vintage machines I found way back in early 2010 were a few Union Special machines, 39200 and a 43200g - I only got the machine heads - as i found importing sewing machines heads, was just easier like that. I Imported the machines in, then just handed the machines to a sewing machine shop ( and just hoped for the best )- They would take care of mounting the machine on a available old table or in some cases a new table - I didn't get to involved with the motor type - and was generally quite happy with the result - as they did all the hard work for me. But the more machines I acquired - the haphazard nature of different machines on different types of tables, sizes, different heights - I found, I said to my self - when things slowed down, I would spend some energy making each of the machines a uniform height - and if I could on the same type of table.
The more time I spent finding machines, I also got very interested in the cast iron tables legs too ( singer ones), and metal / cast iron thread / spool holders, but really only the really really old / early examples - did you know, the very early 1920's Union specials thread holders had curved tops ? - which look just amazing ! and so much more elegant - and just completed the machines overall appeal - slowly i decided I just could not put such a old beautiful machine with a horrible - plastic thread holder, and modern table anymore.
I have no problem with modern tables with old machines on top - but I just started looking for the right types of legs which might best fit my vintage machines - and it started like that.

Above ( Left ) is a modern table ( which looks really nice ) next to a old table ( Right ), with a union special 39200 overlocker - with a vintage thread holder - modern waste shoot and servo silent motor - it was a fun project.
Im not alone in this obsession, but for the last few years I have been spending the same amount of time and energy, hunting down as much as I could with a mixture of old and new accessories to compliment my machines.
Check out our many machine friends, who all have this same bug as me - but by far - Ben Viapiana has inspired many of us and taken it to another level with his old Bangkok setup, and soon to be newly established Toronto, Canada, set up :

Ive made it my mission last few years to fit as many machines in to my ENDRIME studio - so its meant cutting down table sizes, finding smaller tables legs etc.. but most importantly using modern silent servo motors...
Having now mounted well over 10 machines my self ( I have well over 20 vintage machines now) - I thought it would be nice to share a run down of what things you need, if you gonna mount a machine on a table your self with out the help of a sewing machine mechanic.
Its really not hard, your confident with a drill, you should be okay - but it can take time, buying all the things you need -
Tools you might need:
- A good Saw or Power Saw
- Screw drivers
- Power drill
- Sewing machine table legs
- Wood for table top and Bolts for wood
- Thread - cone / spool stand - depending on the machine - 2 ~ 6 holders
- 2 foot pedals - master and secondary
- Machine Light
- Pitman rod
- Castor wheels
- Silent Servo motor
- Chain and S hooks for secondary foot pedal ( often used for raising the foot ).
- Leather belt - for machine to motor and hooks
There's been a slow trend amongst many of my machine friends - a kind of unspoken rule - but all of us are doing it - "old machine table legs and cast iron thread / spool stands" - we all thrive for it.
Lets break it down step by step:
- - - - - - - - - - - - - - - - - - - - - - - - - - - - - - - - - - - - - - - - - - - - - - - - - - - - - - - - - - - - - - - - - - - -
1. Sewing machine table legs
For me, I have a section of modern machines and vintage ones - I think its way cooler you try and find old machine legs for these older machines. Its easy finding old Singer legs - There are soooooo many on eBay - most have been converted to beautiful garden tables like below...

Some are missing parts, like foot pedals or foot plate. ( as above ) but you can be adventurous, and stick 2 machines on 1 table - thats what I thought when i saw the one above.
When I was traveling round Asia, I found some genius modern tables - Below is a test table in a sewing machine shop - you can have 3 machines hook up to it in 1 go, plus its on wheels - just amazing... if only it came in black !

But, I made it my mission to try and repurpose, old singer legs - and try and have my machines looking uniform in my studio...
1st of all, it comes down to the type of sewing machine you gonna put on a old table - in most cases you need 2 foot pedals - and most old machines need a second pedal for the foot to be raised. Most Singer Treadle type legs - like below, only have 1 foot pedal...

So in most cases the above legs ( treadle type ) might not be suitable for a machine which need 2 pedals- The best bet is one of these below : (I came this this conclusion independently - but after seeing a few friends in japan who also have a vintage machine problem like me, it made sense to carry on my hunt) so again the best type of tables you need to hunt down are:

A: Is the most sort after machine legs - hands down... they are super rare - These are perfect cast iron Singer machine legs as they are not so wide, but just the right width, they have extra space to move about in for your legs. The master foot pedal you can place anywhere you desire ( as it blots on ), and most importantly you can add - additional secondary foot pedals as theres a foot plate in place. These tables are strong and Heavy - about 15-18kg - There are a few different versions around, as Singer did do different heights on them, and even licensed the tables out to other companys- but all the tables look the same - most important thing is it must have foot plate - so you can add more foot pedals - if you see one, bag it with out delay.
B: This is another rare table - As it includes the second foot pedal in the table - ( super cool ) These tables are tiny - but cool if you manage to fit a motor, and a pitman rod around an already busy metal frame. Ive done a few conversations which this tiny table - works well.
It comes down to this, modern table legs vs vintage - now, I would pick vintage always - yes they might be heavier - and some cases smaller - but they look way cooler -
Below is out Buddy redcloud423 - He has been also hunting down the same table legs like me... and has done a fabulous job - refurbishing old machines.

Other great friends - like mgbakerco - have used super mini tables so they can fit as many machines in there studio - fantastic job !


Even our buddy ooe yofukuten have got the same idea as us, and are using a old singer table for there union special 43200g

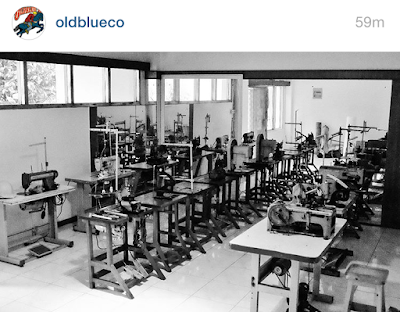
Notable mentions oldblueco - with there impressive set up, using a mixture of vintage and modern tables.
2. Wood for table top and Bolts for wood
Generally - picking out the right wood surface is a personal thing - My personal favourite has to be Ben Viapiana again - not only did he, manage to fit all this machines in a small converted container, he did a beautiful job on every single machine. He made sure each of this table legs were the same, and made custom wood tops for each machine - a real inspiration ! -

Just as impressive is our buddy Navid Dastanai / billthebutchr - who has been fearless on his custom machine table builds - in recent cases, he has been putting 2 machines on a single table, with fantastic results.

Our buddy oldblackmachines - has the right idea - esp with the wood he has picked - and again - cut down to a small size for his set up - perfect !

Below is a example I have been doing - I have found 6 singer legs the past 2 months, so I have been making table tops for them all - so they are all the same. All i have to is stain / varnish them, then attach and aline vintage machine, and motor, and foot pedals... ( admit-tingly my wooden tops could be little more thicker - but these will do the job nicely once finished, as most of the vintage machines I have been buying will just sit / rest on top ) I am quite happy with the results so far.

3. Thread / Cone / spool stand -

Most industrial sewing machines come with boring thread stands like above - which do one thing right - they keep out of the way when sewing - Modern factory safety regulations mean, most thread stands have the power lead coming out of them also... ( so keeping the wires away from the floor ) which is also cool - but these Vintage machines with these types of thread holders - sometimes look crap and often mess up the look.
Depending on the machine your installing - you will need 2 - 6 thread stands -
I spend a great deal of time hunting down these stands - and they are very hard to come by now - most were scrapped for metal during the WWII are after - but every now and then, you hit the jack pot. These often sell for over for $200 USD each - and more the holders more expensive the stand.


 |
There is something very elegant and stunning about vintage thread stands above - if you come across one of theses- make sure to pick it up ! When I was last in Bangkok, me and my friend Ben Viapiana found a vintage sewing machine shop with had loads of them, but the guy was not willing to sell to us at the time - sad - but its good to know, if you look hard enough- you can still find them...

4. Foot pedals - most machines need 2
okay - you might be thinking, why go to all the trouble, hunting down a vintage table - when i can just buy this:

There are many different types of vintage machines tables / legs - some you can use very easily, but some you might have to be inventive - The main thing you need to consider is to have a foot plate - so you can attach foot pedals - below is a great example Ben Viapiana found in Canada - its a Singer machine, thats been transplanted to custom table frame, with the strangest ( but brilliant ) foot pedal.

Of course - there are many types of foot pedals you can attach on a sewing machine table - some really special ones -

As mentioned most old machines need a second foot pedal, so having the space, so your free to customise to have more pedals is important - again if you find a foot pedal you like - just buy it, as they are getting harder to come by.
check out daniel a skinner - this lucky dude found a spare Reece 101 foot pedal recently-

5. Machine Light

6. Pitman rod

7. Castor wheels

Machines are heavy - once you put a 15-20kg machine head on a 15-20kg cast iron table, with 5-8kg motor its super heavy, then there is foot pedals, thread stands... its endless - Most would not think about putting wheels on their machines - but I like to have them free and easy to move about - This is mainly as I like to change the layout for the studio time to time - ( change the order of the machines im using etc...) plus i always knew one day i would move into a bigger space so I am thinking ahead.
The above image, I found the rarest of rare - singer table, the particular table I think is best. I found it easier attaching castor wheels to wood before ( which i will paint black later ) - then attached it to the table - I have 9 of these tables now - so all will be the same height once finished.

If you notice, even our buddy kamo1979 - has attached castor wheels to his vintage machine set up - using a similar 1940's Singer cast iron frame - and he has cut / chopped his wooden top of the table down - so used the minimal amount, smart dude.
8. Silent Servo Motor

One of the 1st memory's I have as a child, is play under my mums sewing machine, and hearing the "hum" sound from her Brother Clutch lock stitch machine - This was about 1984 - 1985ish
Now, sewing machine motors have become lighter and cheaper to make - Most Industrial machines will still come with Clutch motors - and often weigh as much as the machine. You can request loads of extras now, (like buying a car) - things like; thread cutters, and needle positions aids can be added for very little extra. but I would stick to just a plan Servo for now. The only down side is most Servo motors are like computers - so some reading might be needed if you have to change the direction of the motor for example - but these are simple fixes.
When i started buying vintage machines - i was advised very early to use Servo motors only - I have been told there alot more safer to use and better for the vintage machine - as they use less pressure - so will not wear out your already antique machine, not 100% sure if thats true, but makes sense.
Silent Servo motors are universal, and perfect for most industrial sewing machines, being single phase with a 3 pin plug, it is suitable for both home use and industrial use. Their speed is adjustable, and energy saving - there no "hum" on this motor - These motors are perfect for straight stitch machines where adjusting speed is priority, and walking foot machines.
9. Chain and S hooks for secondary foot pedal ( often used for raising the foot )

It would be surprising the amount of time, ive spent looking for the right chain and size of S hooks - but once you find the right one, buy many - so its looks consistent with your many machines. You will often need these for the secondary foot pedal -
10. Leather belt - for machine to motor
Most modern industrial sewing machines, when you buy the machine, it comes with a motor, which also comes with a belt - Nice and easy - a package deal - These belts are about 3/8" across - and come in various sizes - handy... see below.

But... old 1930s singers, 1930s-40s union special machines etc..- there belt sizes ( or widths) are 3/16" or 5/16" - slightly thinner then modern 3/8" thickness - Also there more variables that effect the size of belt you need; you might get a modern motor - or your wood for the table top, you have used might be super thick, or your motor might be not directly under the machine, so you might need a longer belt. Getting a belt in your size might not be possible, as they come in set sizes, you might have to order it - as waste time - The solution is easy - buy some old singer treadle belt cord - see below:

I prefer to just buy the old leather treadle belts - and cut them down to size - Ive come a cross 2 different types of belt widths - 3/16" ( 5mm ) and 5/16" ( 8mm ) - make sure to get the hooks as well -
Another good example - why it might be best to just buy on the roll - you might raise your machine higher - take fielddenim below - he has raised his union special waistband machine - situations like this - having you own custom belt size helps.

On conclusion
I hope this 101 guide will help some one, who wants to attempt to put a sewing machine on a table -
You might not 100% agree with some of my points, mixing old with new - But i really do believe recycling old tables - and re-purposing them to be machines again is only a good thing, plus it adds value to your already expensive purchase - But theres fun about finding a table and old machine parts - which in most cases - were heading for scrap metal - and making use of them again.
Heres our buddy paleodenim - who had adapted his button / kick press on a cast iron sewing machine stand, and added his coller turn to boot - just superb.